
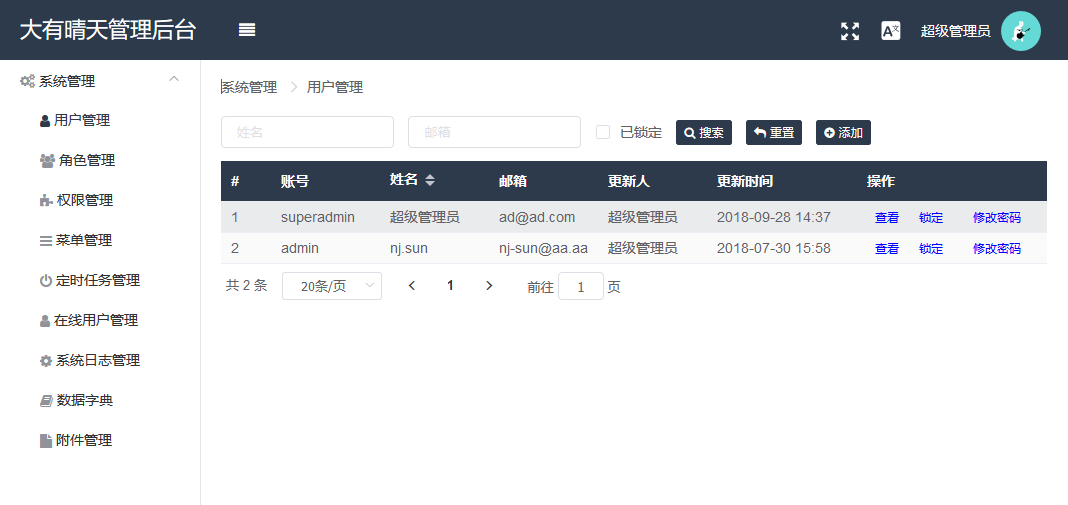
最近看到vue-cli3.0已经发布了,于是想到了今年初我们的一个基于vue-cli2.0的小项目,也使用了Vue+Element做前端,采用前后分离的方式部署。后端的开发人员来做前端还是有一些路要走的,毕竟前端的框架库,甚至思想都已经发生了巨大的变化,早已不是一个jquery就能一统江湖的时代了。甚至连我们之前一直在用的Easyui也都出了Angular和Vue的版本。但即使做后端对于前端的知识及发展还是要有所了解。这篇粗略的回顾了使用vue-cli 2.0版本脚手架基于vue开发的前端应用的过程,以及所要考虑的点,同时也附上了我们在遇到某些问题时解决的代码。
开发工具,技术及版本
- VSCode 前端开发工具
- Node.js https://nodejs.org/en/
- vue-cli 构建工具
- vue 2.* https://cn.vuejs.org/
- vue-router
- webpack https://www.webpackjs.com/contribute/
- ElementUI http://element.eleme.io/
- Spring Boot 2.0.2
1. 准备工作
- 检查是否安装Node环境,倘若没有安装,则可以在官网下载并进行安装,这里我的版本v8.1.1。
node -v - 查看并更新npm的版本,我的版本6.0.0
npm -v
对npm版本进行升级npm install -g npm
可以修改npm的配置,使用淘宝镜像npm config set registry https://registry.npm.taobao.org - 全局安装webpack:
npm install webpack -g - 安装vue-cli脚手架:
npm install vue-cli -g
注意,这里安装的都是vue-cli 2.0版本
2. 创建Vue工程
首先cmd命令进入我们的工作空间
我们要利用webpack及vue-cli 的脚手架来创建我们的vue工程:vue init webpack 工程名称 如 vue init webpack vue-story
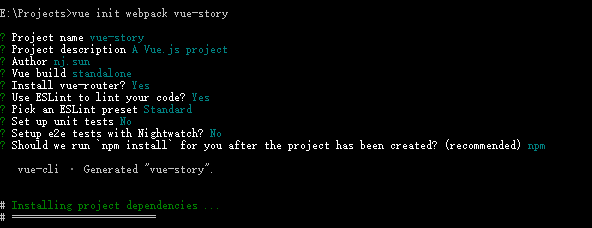
这里有一项询问是是否安装ESlint,ESLint 是一个插件化的 javascript 代码检测工具,对代码的检查比较严格,对于我们这种追求自由的程序员来说还是不太爽,当然后面我们可以根据我们自己的习惯来修改代码检测规则。
当所有依赖都被下载安装完成以后,我们可以看到在我们当前目录下,生成了一个以我们工程名命名的文件夹 vue-story,我们可以在根目录下的 package.json 文件中查看项目的配置信息。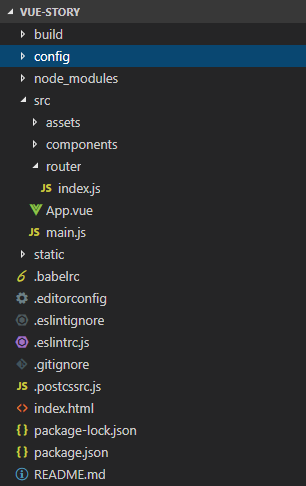
如果这里你安装了ESlint,并且不幸你的强迫症很严重,那么你需要关掉它或者忽略掉文件的检测。可以在config/index.js文件中修改配置useEslint: false 或者在根目录的忽略配置.eslintignore文件中,加入文件后缀,来忽略指定后缀的检测:
*.js
*.vue
*.svg
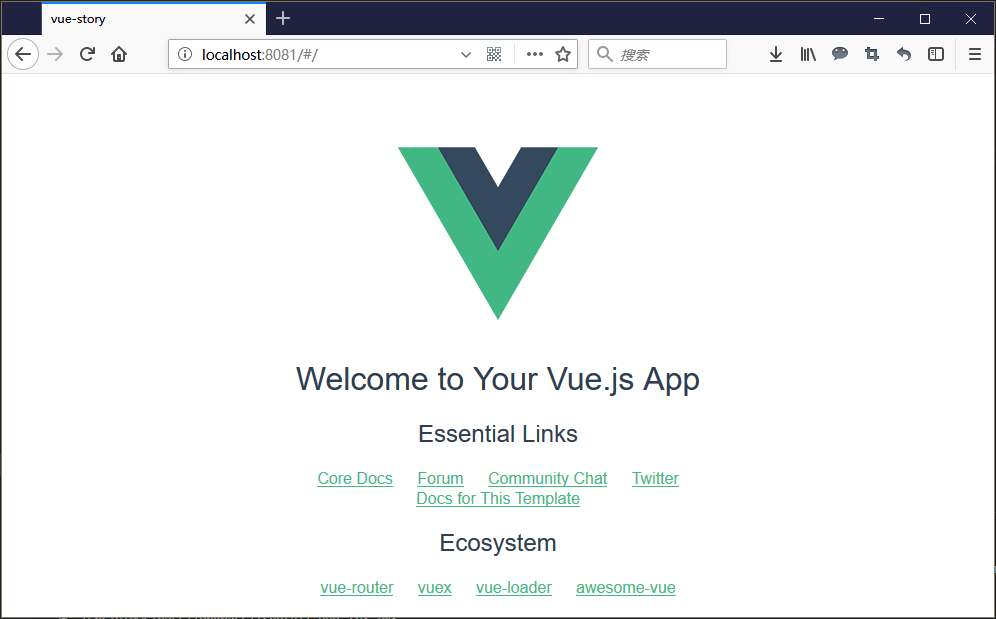
这样一来,我们就可以直接运行命令来启动新的工程了。npm run dev
3. 安装依赖
要想开发一个完整的应用,我们还需要给项目安装一些必要的依赖组件:
安装ElementUInpm i element-ui --save-dev
安装 sass-loader 及 node-sass 依赖npm i sass-loader --save-devnpm i node-sass --save-dev
安装 vuex,axios ,js-cookie,nprogress 等组件npm i vuex --savenpm i axios --savenpm i js-cookie --savenpm i nprogress --save
安装 svg loader 来支持SVG格式矢量图npm i svg-sprite-loader --save-dev
同时还要修改build/webpack.base.conf.js下的module.exports.module.rule属性,增加或修改如下配置
{
  test: /\.svg$/,
  loader: 'svg-sprite-loader',     //引入svg-sprite-loader处理svg文件
  include: [resolve('src/icons')],
  options: {
    symbolId: 'icon-[name]'
  }
},
//修改
{
  test: /\.(png|jpe?g|gif|svg)(\?.*)?$/,
  loader: 'url-loader',
  exclude: [resolve('src/icons')],  //忽略src/icons目录下的文件
  options: {
    limit: 10000,
    name: utils.assetsPath('img/[name].[hash:7].[ext]')
  }
}
修改png,jps等素材的配置,增加exclude属性,目的是忽略src/icons下的svg文件,交给上面的svg-sprite-loader来处理svg文件
安装第三方图标库 font-awesomenpm i font-awesome --save
国际化多语言支持npm i vue-i18n --save
浏览器全屏支持npm i screenfull --save
当我们想要深度的修改ElementUI主题样式时,我们还需要安装:npm i element-theme-chalk -D
还有支持ie9及其低版本的浏览器对ES6的支持npm install --save babel-polyfill
到这里,其实我已经一次性的将我们需要用到的依赖组件全部安装到了项目当中。这里没有写每一个组件到底怎么使用,具体如何使用网上已经有了很多的资料,需要学习的人自己去搜索。
我们同样可以在 package.json 文件中来查看项目所有的依赖及版本。
到这里,再来看看我们src目录下的main.js文件,我们当然要引用我们所添加的组件:
// The Vue build version to load with the `import` command
// (runtime-only or standalone) has been set in webpack.base.conf with an alias.
import Vue from 'vue'
import ElementUI from 'element-ui'
import '../theme/index.css'
import 'font-awesome/css/font-awesome.min.css'
import '@/styles/index.scss'  // global css

import App from './App'
import router from './router'
import store from './store'

import i18n from './lang' // Internationalization
import '@/icons' // icon

import '@/permission' // permission control
import './utils/constant.js'
import message_box from './utils/messagebox'
import authority from './utils/authority'

Vue.use(ElementUI, {
  size: 'medium', // set element-ui default size
  i18n: (key, value) => i18n.t(key, value)
})
Vue.use(message_box)

Vue.use(authority);
Vue.config.productionTip = false

/* eslint-disable no-new */
new Vue({
  el: '#app',
  router,
  store,
  i18n,
  components: { App },
  template: '<App/>'
})
这里new的Vue对象中,我们在app的元素中引入了路由router,状态管理store,国际化il8n。
再来看下我们src目录下的结构: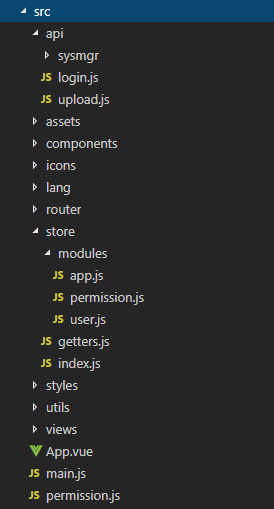
简单说下:
1. api 主要定义我们后端的接口,我们可以按照模块划分,统一管理
2. components 可以公用并独立出来的自定义组件
3. lang 我们国际化用到的语言文件
4. router 路由
5. store 使用Vuex来管理状态
6. utils 其中包括我们的共通的一些方法。
7. views 这里面就是我们路由要加载的页面了。
4. 使用Axios
简单看下api中的文件,如我们src/api/sysmgr/syslog.js文件
import request from '@/utils/request'
export function getLogListPage(param) {
    return request({
      url: '/sysmgr/syslog/query_page',
      method: 'post',
      data:param
    })
}
再来看看我们的utils/request.js,由于vue-resource不再维护,并且官方推荐使用axios,axios是一个用于浏览器和node.js的基于Promise的HTTP客户端,可以帮助我们去做http请求。我们对所有的http请求进行拦截,可以做一些共通的处理,代码比较简单,可以根据自己的需要来完善。
import axios from 'axios'
import { Message, MessageBox } from 'element-ui'
import store from '../store'
import { getToken } from '@/utils/auth'

// 创建axios实例
const service = axios.create({
  baseURL: process.env.BASE_API, // api的base_url
  timeout: 15000 // 请求超时时间
})

// request拦截器
service.interceptors.request.use(config => {
  config.url="/sys"+config.url;
  if (store.getters.token) {
    // config.headers['X-Token'] = getToken() // 让每个请求携带自定义token 请根据实际情况自行修改

  }
  return config
}, error => {
  // Do something with request error
  console.log(error) // for debug
  Promise.reject(error)
})

// respone拦截器
service.interceptors.response.use(
  response => {
    const res = response.data
    if (res.resultCode !='SUCCESS') {
      Message({
        message: res.message,
        type: 'error',
        duration: 5 * 1000
      })
      return Promise.reject('error')
    } else {
      return response.data
    }
  },
  error => {
    Message({
      message: error.message,
      type: 'error',
      duration: 5 * 1000
    })
    switch (error.response.status) {
      case 401:
        store.dispatch('FedLogOut').then(() => {
          location.reload()
        });
        break;
    }
    return Promise.reject(error)
  }
)
export default service
5. 动态添加路由及权限控制
5.1 动态路由
这里其实最主要想说的是动态路由的部分,首先来看下我们路由文件中的配置,只有几个链接:
import Vue from 'vue'
import Router from 'vue-router'
import Layout from '../views/layout/Layout'
Vue.use(Router)

export const constantRouterMap = [
  { path: '/login', component: () => import('@/views/login/index'), hidden: true },
  { path: '/404', component: () => import('@/views/404'), hidden: true },
  {
    path: '/',
    component: Layout,
    redirect: '/dashboard',
    name: 'Dashboard',
    hidden: false,
    children: [{
      path: 'dashboard',
      component: () => import('@/views/dashboard/index')
    }]
  }
]

export default new Router({
  // mode: 'history', //后端支持可开
  // scrollBehavior: () => ({ y: 0 }),
  routes: constantRouterMap
})
插一句,默认情况下url中都是有#号的如http://localhost:8100/#/sysmgr/menu,如果想要去掉#,则可以开启mode: 'history',当然我们的Nginx也要添加相应的支持配置,root 路径根据情况写:
location / {
    try_files $uri $uri/ /index.html;
    root   /usr/local/nginx/html;
}
回到路由的问题上,通常在系统中,系统的菜单都是根据权限控制来动态生成。那如何处理权限的控制呢?
import router from './router'
import store from './store'
import NProgress from 'nprogress' // Progress 进度条
import 'nprogress/nprogress.css'// Progress 进度条样式
import { Message } from 'element-ui'
import { getToken } from '@/utils/auth' // 验权

const whiteList = ['/login'] // 不重定向白名单
router.beforeEach((to, from, next) => {
  NProgress.start()
  if (getToken()) {
    if (to.path === '/login') {
      next({ path: '/' })
    } else {
      if (store.getters.funcs.length === 0) {
        store.dispatch('GetInfo').then(res => { // 拉取用户信息
          const menus = res.data.resource
          var fmtRoutes = formatRoutes(menus);
          //动态添加
          router.addRoutes(fmtRoutes);
          store.commit('INIT_MENUS', fmtRoutes);
          //存储权限码
          store.commit('SET_FUNCS', res.data.user.authoritys);
          next({ ...to, replace: true })
        }).catch(() => {
          store.dispatch('FedLogOut').then(() => {
            Message.error('验证失败,请重新登录')
            next({ path: '/login' })
          })
        })
      } else {
        next()
      }
    }
  } else {
    if (whiteList.indexOf(to.path) !== -1) {
      next()
    } else {
      next('/login')
      NProgress.done()
    }
  }
})

router.afterEach(() => {
  NProgress.done() // 结束Progress
})

export const formatRoutes = (routes)=> {
  let fmRoutes = [];
  routes.forEach(router=> {
    let {
      url,
      name,
      iconClass,
      children,
      hiddenFlag,
      component,
      redirect
    } = router;

    if (children && children instanceof Array && children.length>0) {
      children = formatRoutes(children);
    }

    let fmRouter = {
      path: (url=='-'?'/':url),
      component(resolve){
          require(['./views'+component+'.vue'], resolve)
      },
      redirect:redirect,
      name: name,
      iconCls: iconClass,
      hidden:hiddenFlag,
      children: children
    };
    fmRoutes.push(fmRouter);
  })
  return fmRoutes;
}
简单解释下这里的逻辑:
1. 任何页面我们都要求通过请求路由之前检查是否已经登陆,如果已经登陆,则会拉取用户信息,其中用户信息包含授权的权限及菜单信息。
2. 通过formatRoutes方法将用户信息中的菜单信息数据做转换,由router.addRoutes动态的添加到路由中。保存当前用户被授权的权限编码,供后续的页面通过权限控制功能显示。
5.2 功能权限控制
我们在进入页面时已经拉取到了用户信息及权限,那么当我们要控制页面功能是否显示时,则需要检查是否具有权限,这样我们在utils/authority.js中写一个方法,通过传入的权限编码,看是否在我们的授权列表中:
let authority = {};
authority.install = function (Vue, options_plugin) {
    Vue.prototype.hasAuthority = function (funcCode) {
        const funs = this.$store.getters.funcs
        for(var i=0;i<funs.length;i++){
            if(funcCode===funs[i]){
            return true
            }
        }
        return false
    }
}
module.exports = authority;
返回true就是显示,返回false则相反。好了,因为我们在main.js中引用了这个模块,那么我们就可以直接来用。通过在元素上增加属性就可以控制元素是否显示。假设某一个按钮功能的权限编码是sysmgr.user.update,那么我们只要添加:
v-show="hasAuthority('sysmgr.user.update')" 即:
<span v-show="hasAuthority('sysmgr.user.update')">
...
</span>
6. 跨域 ProxyTable
采用前后端分离的方式就会涉及到跨域及代理的问题,好在ProxyTable能够帮助我们在开发阶段解决跨域的问题。
我们可以修改config/index.js文件中的配置module.exports.dev.proxyTable:
proxyTable: {
  '/sys': {
    target: 'http://localhost:8101',
    changeOrigin: true,
    pathRewrite: {
      '^/sys': ''
    }
  }
}
这里的意思是将uri以/sys开头的请求代理到'http://localhost:8101'上,并且可以重写url。
前端工程启动的默认端口是8080 ,我们也可以在下面的port属性上修改,如我们修改成8100。port: 8100
关于前端其实还有一些要记录,但是很多问题都是在实际用到的时候才能想到,这里关于前端的搭建就先总结到这儿。而后端当然我们只需要提供Rest的接口即可,我们依然采用SpringBoot开发,将原有的系统管理模块移植了过来,因此后端与传统保持不变。总的说来使用Vue开发的确使开发者的注意力集中在了模型与数据上,消灭了对DOM对象的依赖,倘若熟练使用Vue以及前端的开发组件,事半功倍还真不是问题!