
Spring Boot 是我们开发Web应用程序的一套全新框架。它提供了一种新的编程范式,能在最小的阻力下开发Spring应用程序。针对很多Spring应用程序常见的应用功能,Spring Boot能自动提供相关配置。
Spring Boot 在应用程序里嵌入了一个Servlet容器(Tomcat、Jetty或Undertow),我们可以把Web应用程序变为可自执行的JAR文件,不用部署到传统Java应用服务器里就能在命令行里运行。
创建项目
通过Spring Initializr生成空Spring项目的Web应用程序。
http://start.spring.io/
创建一个Spring boot后,引用的核心包如下:
<dependency>
    <groupId>org.springframework.boot</groupId>
        <artifactId>spring-boot-starter</artifactId>
    </dependency>
    <!-- Web模块 -->
    <dependency>
        <groupId>org.springframework.boot</groupId>
        <artifactId>spring-boot-starter-web</artifactId>
    </dependency>
</dependency>
当然我们可以在创建项目的过程中,会选择我们要依赖的组件,勾选了Web、Thymeleaf和JPA这几个复选框。
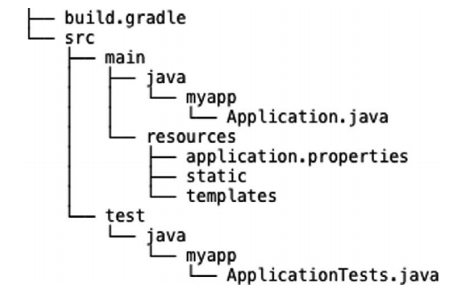
根目录下的***Application.java在Spring Boot应用程序里有两个作用:配置和启动引导。这是主要的Spring配置类。虽然Sprin Boot的自动配置免除了很多Spring配置,但还需要进行少量配置来启用自动配置。
如我们工程里面的Application类:
@SpringBootApplication  //开启组件扫描和自动配置
public class StoryWebApplication {
    public static void main(String[] args) {
        //负责启动引导应用程序
        SpringApplication.run(StoryWebApplication.class, args);
    }
}
实际上,@SpringBootApplication将三个有用的注解组合在了一起:
Spring的@Configuration:标明该类使用Spring基于Java的配置。
Spring的@ComponentScan:启用组件扫描,Web控制器类和其他组件能被自动发现并注册为Spring应用程序上下文里的Bean。
Spring Boot的@EnableAutoConfiguration:开启Spring Boot自动配置的功能。
这里的main()方法让可以在命令行里把该应用程序当作一个可执行JAR文件来运行。这里向SpringApplication.run()传递了一个
当前类的引用,还有命令行参数,通过这些东西启动应用程序。
自定义配置
file.absolutePath=E:/upload
file.absolutePath.origin=${file.absolutePath}/origin/
我们可以通过'@Value'注解来使用配置属性:
@Service
public class FileUploadServiceImpl{
    @Value("${file.absolutePath.origin}")
    String imgOriginBaseAbsPath;
    //...
}
或者我们也可以这样使用:
story:
  kaptcha: true
  safeCheck: true
  ldapurl: ldap://****:***/
@ConfigurationProperties(prefix = "story")
@Data
public class StoryProperties {
    private Boolean kaptcha;
    private String ldapurl;
    private Boolean safeCheck;
}
接下来我们就可以这样用了:
@Configuration
public class LdapConfig {
    @Autowired
    private StoryProperties storyProperties;
    //...
}
JPA 实现数据持久化
JPA的核心是通过Hibernate自动化的生成各种操作数据库sql语句。
<dependency>
    <groupId>org.springframework.boot</groupId>
    <artifactId>spring-boot-starter-data-jpa</artifactId>
</dependency>
<!-- Mysql -->
<dependency>
    <groupId>mysql</groupId>
    <artifactId>mysql-connector-java</artifactId>
</dependency>
spring.datasource.url=jdbc:mysql://localhost:3306/story_web?characterEncoding=utf8&useSSL=true
spring.datasource.username=root
spring.datasource.password=123456
spring.datasource.driver-class-name=com.mysql.jdbc.Driver
spring.jpa.show-sql= true

spring.jpa.properties.hibernate.hbm2ddl.auto=update
spring.jpa.properties.hibernate.dialect=org.hibernate.dialect.MySQL5InnoDBDialect
hbm2ddl.auto=update表示这里我们可以通过JPA来动态的更新数据库。create:每次启动都会删除表后重建;update:每次更新表结构,但模型中删除的属性在表中需要手动删除;create-drop:创建表后随着sessionFactory关闭自动删除;validate:加载hibernate时,验证创建数据库表结构不常用
再来看看我们的实体类的定义:
@Entity
@Table(name = "bp_user")
public class User {
    @Id
    @GeneratedValue
    private Long userId;
    @Column(nullable = false, unique = true)
    private String userName;

    @Column(nullable = false, unique = true)
    private String email;
    //...

    @ManyToMany(fetch= FetchType.EAGER)//立即从数据库中进行加载数据;
    @JoinTable(name = "BpUserRole", joinColumns = { @JoinColumn(name = "userId") }, inverseJoinColumns ={@JoinColumn(name = "roleId") })
    private List<Role> roleList;

    @OneToOne(cascade={CascadeType.REMOVE},fetch = FetchType.LAZY,orphanRemoval=true)
    @JoinColumn(name="userId",referencedColumnName="userId")
    private UserAuthLocal userAuthLocal;

    @Transient
    private String password;
    //...
}
定义我们的实体,以及关系,不需要在表中创建字段的,我们需要用@Transient标记。
这里@Id表示userId表示主键,@GeneratedValue表示自增。
public interface UserRepository extends JpaRepository<User, Long>,JpaSpecificationExecutor<User> {
    User findByUserName(String userName);
    //...
    @Modifying(clearAutomatically=true)
    @Transactional
    @Query("update User set passWord=:passWord where email=:email")
    int setNewPassword(@Param("passWord") String passWord, @Param("email") String email);
}
我们只要继承JpaRepository就可以了,而JpaSpecificationExecutor用于实现复杂的查询。</user,>
Thymeleaf 模板引擎
Thymeleaf 是一个专们用来开发前端的模板引擎,Thymeleaf通过标签替换原有的静态内容,将数据动态的显示在页面上。并且可以通过各种表达式来进行运算或展示内容,方便的支持文字的国际化。
<dependency>
    <groupId>org.springframework.boot</groupId>
    <artifactId>spring-boot-starter-thymeleaf</artifactId>
</dependency>
<!DOCTYPE html>
<html xmlns:th="http://www.thymeleaf.org">
<head>
    <meta charset="utf-8" />
    <meta http-equiv="X-UA-Compatible" content="IE=edge" />
    <meta content="width=device-width, initial-scale=1, maximum-scale=1, user-scalable=no" name="viewport" />
    <title></title>
    <link rel="stylesheet" th:href="@{webjars/bootstrap/3.3.7-1/css/bootstrap.min.css}" />
</head>
<body>
    <div class="wrapper" id="storyApp" v-cloak th:fragment="navbar">
        <div th:replace="admin/fragments/header :: header">Header</div>
        <div th:replace="admin/fragments/left :: left">left</div>
        <div class="content-wrapper" id="content">
            <div th:replace="admin/dashboard :: dashboard">admin_dashboard</div>
        </div>
        <div th:replace="admin/fragments/footer :: footer">left</div>
        <div th:replace="admin/fragments/control :: control">control message</div>
    </div>
</body>
</html>
那么其中left的部分我们可以如下这样去定义:
<!DOCTYPE html>
<html xmlns:th="http://www.thymeleaf.org">
<head></head>
<body class="hold-transition skin-blue sidebar-mini">
    <aside class="main-sidebar" th:fragment="left">
        <!-- 左侧导航的例子 -->
        <div th:each="menu,menuStat : ${menus}" th:title="${menu.name}" th:attr="iconCls=${menu.iconClass}" >
            <ul th:unless="${#lists.isEmpty(menu.children)}" class="cdatalist">
                <li th:if="${#lists.isEmpty(childmenu.children)}" th:each="childmenu : ${menu.children}">
                    <i th:class="${childmenu.iconClass}"></i>
                    <a onclick="javascript:mainPage.openTab(this)"
                        th:url="@{'/'+${childmenu.url}}" th:text="${childmenu.name}"></a>
                </li>
            </ul>
        </div>
    </aside>
</body>
</html>
WebJars
简单的说是将资源文件css或者js等打包成jar文件,来对资源进行统一的管理。
org.webjars
jquery
3.2.1
页面上的引用可以这样写:
<script th:src="@{webjars/jquery/3.2.1/jquery.min.js}"></script>
从本质上来说,Spring Boot就是Spring,它做了那些没有它你自己也会去做的Spring Bean配置。你不用再写这些样板配置了,可以专注于应用程序的逻辑,这些才是应用程序独一无二的东西。